Cathodic Protection Commissioning Reports
- Cathodic Protection, Solar System Commissioning Report
- Cathodic Protection, Plant Buried Piping Commissioning Report
- Cathodic Protection, External Tank Bottom Commissioning Report
- Cathodic Protection, Tank Internal Commissioning Report
- Cathodic Protection, Well Casing/Flowline Commissioning Report
- Cathodic Protection, Pipeline Commissioning Report
- Cathodic Protection, Submarine Pipeline Commissioning Report
- Cathodic Protection, Offshore Well Casing/ Platform Commissioning Report
- Cathodic Protection, Onshore Anode Bed Commissioning Report
Cathodic Protection Commissionig Reports
Cathodic Protection, Rectifier Commissioning Report
1. TEST EQUIPMENT DATA:
Meter Type:—————- Serial No.:………………. Calibration Date: ……………….. Equipment Condition: …………………..
2. SYSTEM DATA:.
Manufacturer: ………………… Model No:……………………. Serial No.: . …………………
Rectifier Type: ………………… Phase: ………………… AC Input: …………………V
Date of Manufacturer: . …………………
D.C. Rating: …………………V ………………… A Operating Output: …………………V …………………A
Setting Type: ………………… Taps: …………………C …………………M …………………F
Rectifier Shunt Rating : …………………A …………………mV
Negative Cable Connected to Structure: …………………kk
Current Drain in Negative Cable: …………………Amps
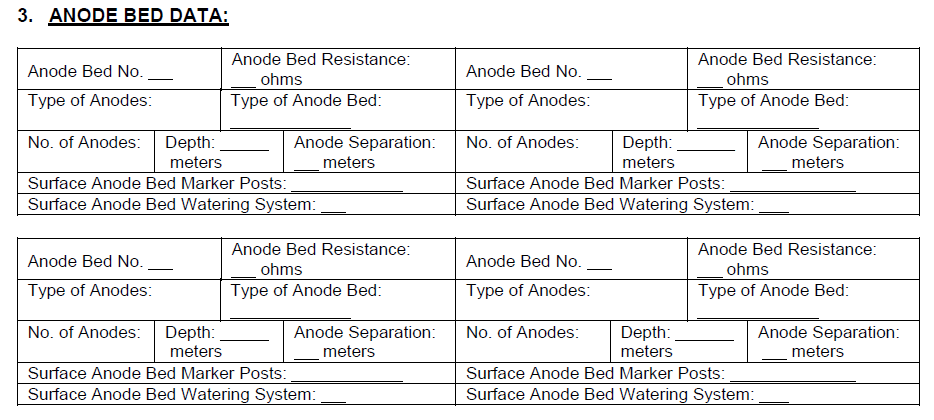
(See “Cathodic Protection Anode Bed Commissioning Report – Appendix K or J” for individual anode output data)
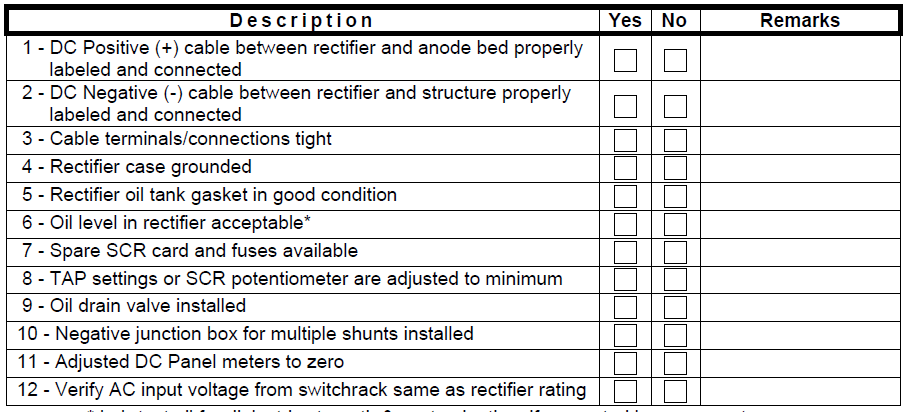
4. CHECK LIST PRIOR TO ENERGIZING:
1 – DC Positive (+) cable between rectifier and anode bed properly labeled and connected.
2 – DC Negative (-) cable between rectifier and structure properly labeled and connected
3 – Cable terminals/connections tight
4 – Rectifier case grounded
5 – Rectifier oil tank gasket in good condition
6 – Oil level in rectifier acceptable*
7 – Spare SCR card and fuses available
8 – TAP settings or SCR potentiometer are adjusted to minimum
9 – Oil drain valve installed
10 – Negative junction box for multiple shunts installed
11 – Adjusted DC Panel meters to zero
12 – Verify AC input voltage from switchrack same as rectifier rating
* Lab-test oil for dielectric strength & contamination, if requested by proponent
5. CHECK LIST AFTER ENERGIZING:
1. Energize the rectifier.
Note: Ensure that the rectifier output is set at the minimum value
2. Record the values shown on the rectifier panel meters: …………………V …………………A
3. Verify rectifier amp/volt meters with reliable portable meter(s): …………………V …………………A
Shunt Rating: …………………mV Amps ( 1 mV = …………………Amps)
4. Increase rectifier output to obtain design output value: …………………V …………………A
5. For rectifiers with link bars: turn off the rectifier before changing the output setting.
6. For three (3) phase system with separate taps in each phase, maintain phase balance by keeping tap positions identical in each phase.
7. Check all DC connections to ensure that there is no excessive heat at the connections (loose connection generates excessive heat). If excessive heat is present, turn off the system, then tighten the loose connections.
Note: Excessive heat from a loose connection immersed in oil can generate bubbles.
8. Check and record oil temperature (if equipped with temperature gauge) : …………………°C.
9. Adjust rectifier output as necessary to obtain adequate protection levels at key locations
10. Conduct performance evaluation of the anode bed (Anode Bed Commissioning Report).
11. Perform CP potential survey (Commissioning Reports)
12. Check structure-to-soil potentials to detect CP interference. If interference is present, identify locations by structure identification.

