TABLE OF CONTENTS
GENERAL
APPLICABLE DOCUMENT
MATERIAL AND RESOURCES
MODIFICATION OF STIFFENER RING
1. GENERAL
1.1 Scope and background
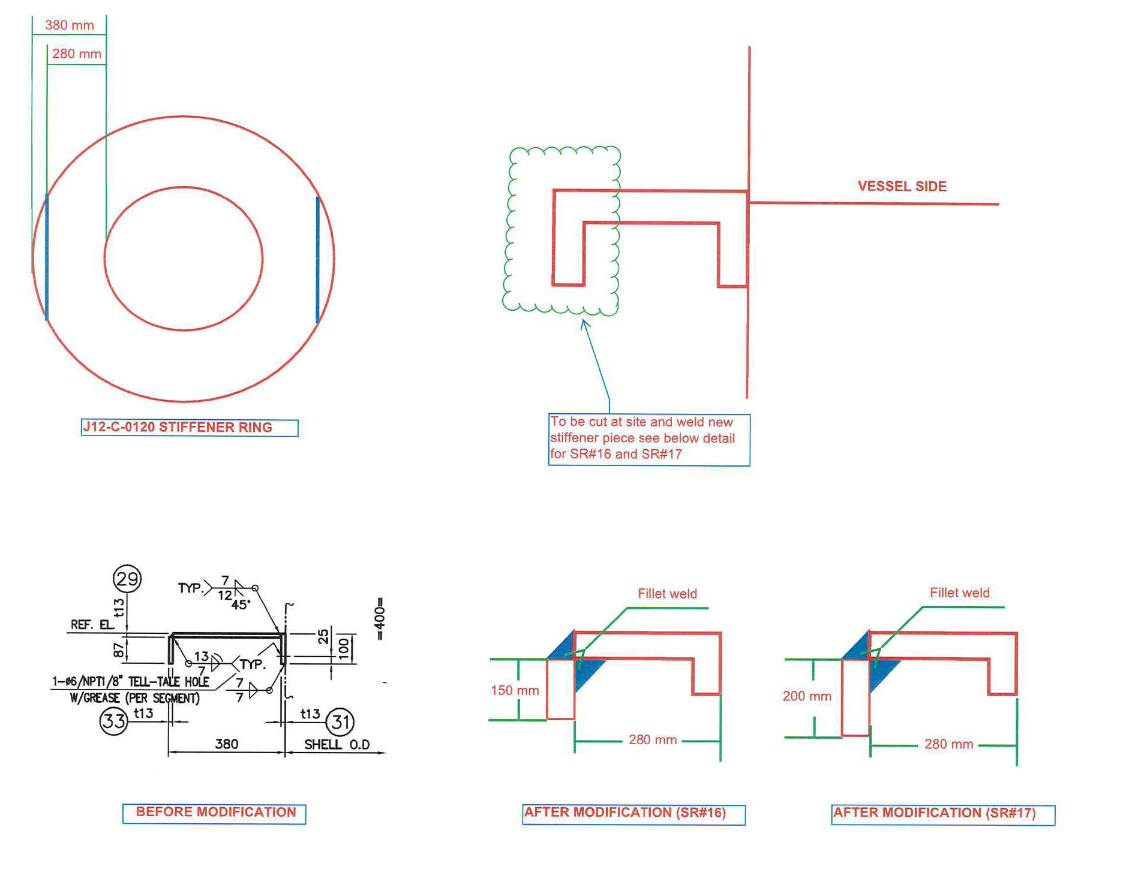
This procedure covers the modification procedure for the stiffener ring of Xylenes Rerun Column. Two stiffener rings, particularly# 16 and# 17, are found out to clash with the crane wire during lifting activities. Therefore, these stiffener rings are subject to partial cutting to have enough clearance from the wire. New stiffener ring pieces will be re-welded to maintain vessel strength from external pressure. Basis of modification works, per calculations, standards and codes, are provided by Column Vendor and carefully reviewed and verified by Contractor.
2. APPLICABLE DOCUMENT
(1) V-2151-201-A-0102 General Assembly (1 /2)
(2) – Stiffener ring modification plan
(3) V-2151-201-A-0002 WPS/PQR with Welding Map
(4) V-2151 -201-A-0013 Painting procedure with paint map (sketch)
3. MATERIAL AND RESOURCES
3.1 Material
(1) New piece stiffener plate for SR#16 And SR#17 will be supplied by the vendor.
3.2 Construction Tools and Consumables
(1) It shall be th e responsibility of SUBCONTRACTOR to ensure that proper tools are used during the modification activity.
(2) Welding consumabl e (such as welding rod, electrode, etc.) are being stored and handled in accord ance with the manufactu re ‘s recommendations.
(3) Grinding disk for cu tting and grinding shall be used separately for safety reason.
4 MODIFICATION OF STIFFENER RING
(1) Two stiffener rings, SR#16 and SR#17 are located nea r the column’s trun nion (Refer to Attachment – 1 ).
(2) Existing stiffener ring dimension is 380 mm and it will be cut to 280 mm to preventing the crane wire to clash. New stiffener piece for SR#16 and SR# 17 will be re-welded, with a dimension of 150 mm and 200 mm respectively. Either SMAW or FCAW can be use, whichever is avail able at site (Refer to Attachment – 2).
(* Note that new dimensions were calculated and provided by Vendor and verified by Contractor, based from certain calculations, codes and standards).
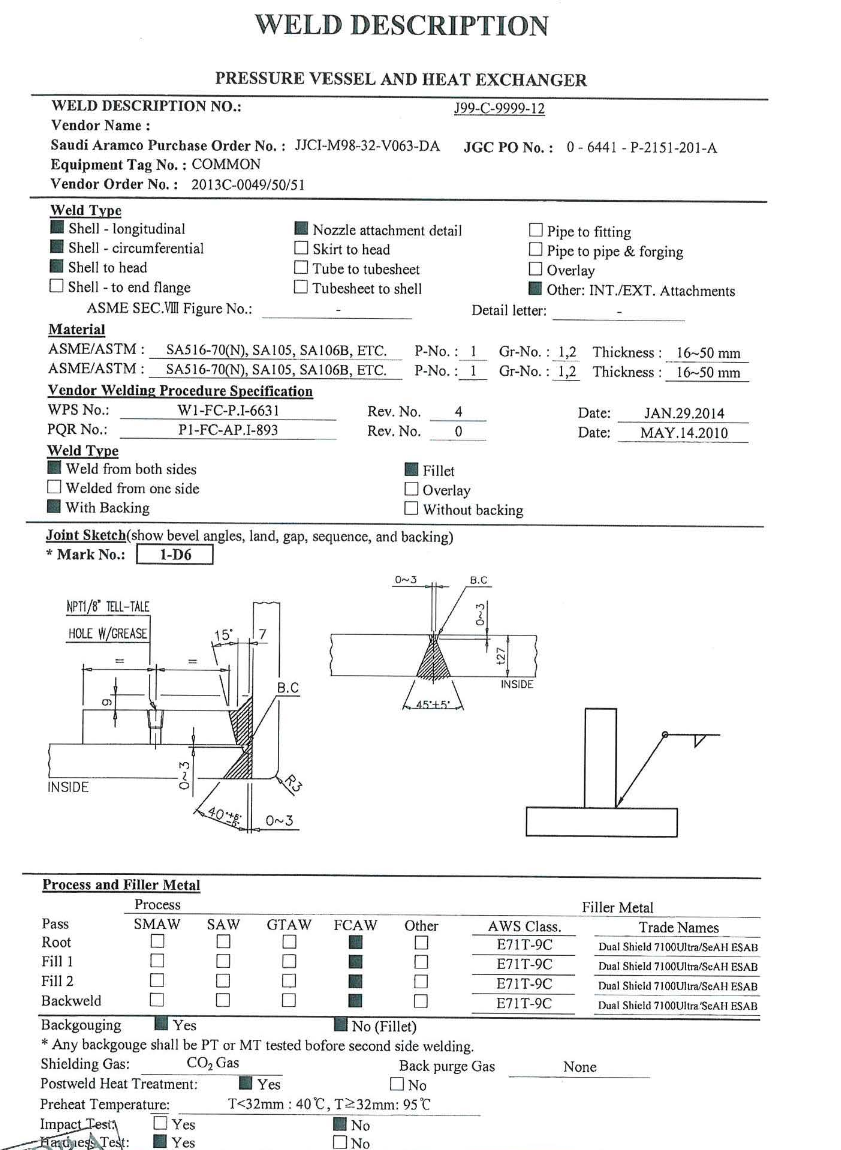
(3) Vendor WPS/PQR is attached for reference only. (Refer to Attachment – 3).
(4) After welding, PT and visual inspection to be carried out. Column hydrotest is not required since welding of the new stiffener pieces are not directly done on the column shell. Impact and hardness test are not required .
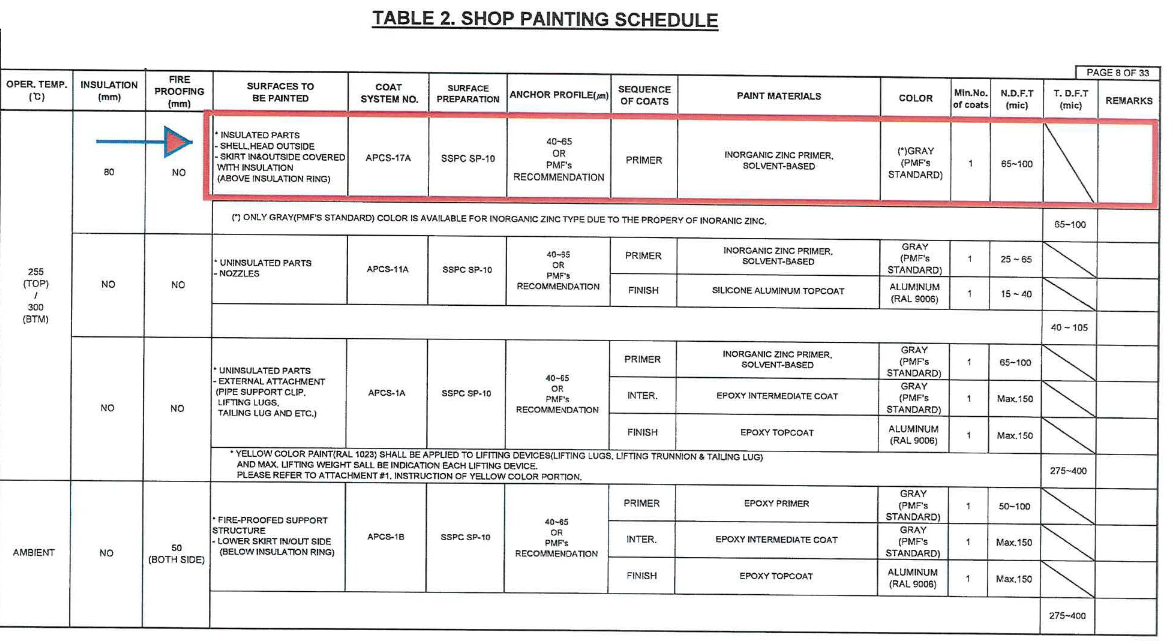
(5) Touch up painting work to be done on the weld portions (Refer to Attachment – 4).
5 Attachment
(1) GA Drawing Example (STIFFENER RING IN COLUMN)
(2) Stiffener ring modification plan sketch (STIFFENER RING IN COLUMN)
(3) WPS/PQR for reference. (STIFFENER RING IN COLUMN)
(4) Painting specification (STIFFENER RING IN COLUMN)
(5) Job Safety Analysis


