Following is list of safety considerations for a good pump installation that focuses on safety, efficiency, and the overall life cycle of the equipment.
- Location: Choose where to install the pump carefully, considering whether it’s indoors or outdoors, the ground level (grade) or on a platform (mezzanine), and how close it is to people and work areas. Also, think about the direction of the prevailing wind and the potential for vibrations from the structure.
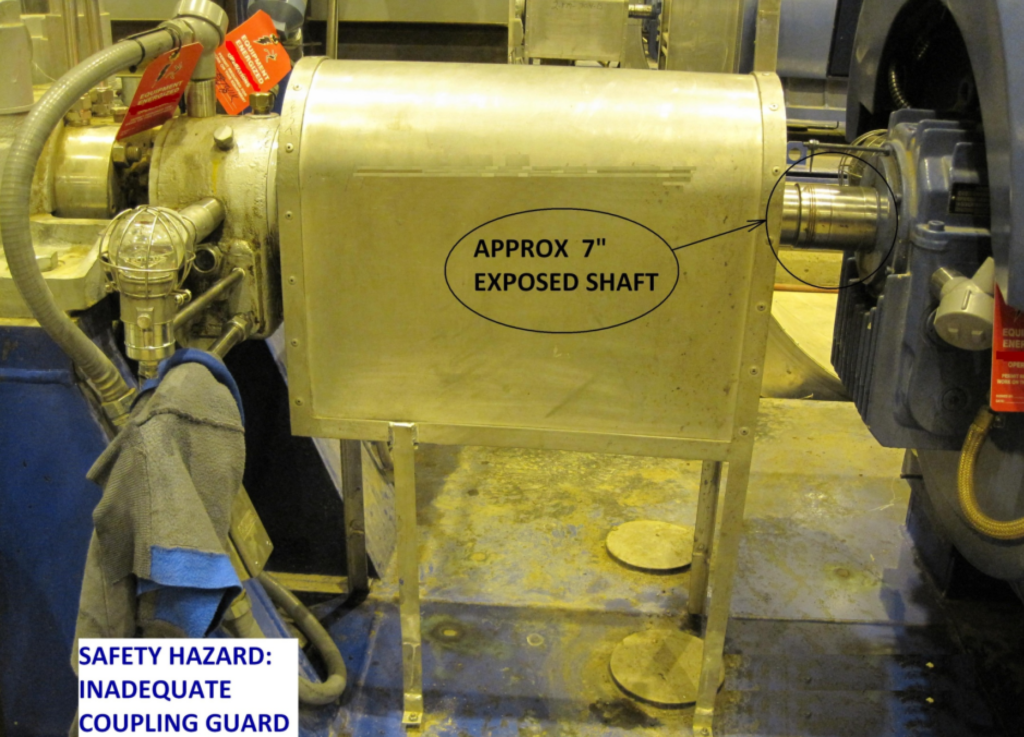
- Safety and Compliance: Make sure the installation complies with safety standards like CSA and OSHA. This includes having proper guards in place to protect people from harm.
- Temperature and Drainage: Consider the temperature of the environment, and ensure that any leaks from the pump are safely directed to places like sewers, dikes, or trenches.
- Access: Ensure that there is clear and unobstructed access around the pump and related equipment for maintenance, inspection, and operation. This includes considering how easy it is for personnel to reach the machinery, pipes, structures, and valves.
- Ergonomics: Think about the ease of performing planned maintenance (PM) and predictive maintenance (PdM) tasks on the pump and related equipment.
- Lighting and Housekeeping: Provide adequate lighting for visibility and maintain good housekeeping practices to keep the installation clean and organized.
- Detectors and Ventilation: Install detectors for things like flammable gases (LEL), toxic gases (H2S), and fire hazards. Ensure there’s enough ventilation to keep the air safe to breathe.
- Alarms and Safety: Set up visible and audible alarms to alert to any issues. Take measures to prevent slips, trips, and falls by removing hazards. Create enough workspace around the machinery, and use signs, instructions, and labels as needed.
- Noise Control: Implement measures to control noise levels.
- Vents and Drains: Properly pipe vents and drains to direct any hazardous materials to safe locations. Consider the support and bracing needed for this.
- Burn Hazards: Identify and address any burn hazards in the installation.
- Floor Drains and Storage: Plan for floor drain locations and storage of materials used in the pump operation.
- Tripping Hazards: Eliminate obvious tripping hazards such as raised edges, lifting lugs, and valve stems.
- Monitoring: Implement a system for monitoring the pump’s criticality and reliability over time.
- Instrumentation: When installing instruments on vibrating equipment, take special care to ensure they are securely mounted to prevent damage or malfunction.
In summary, a good pump installation should prioritize safety, efficiency, and longevity while considering various factors like location, compliance with regulations, and ease of maintenance.
International Code References for Pump Installation:
Here’s what each of these references likely means:
- API-610: This is a reference to the American Petroleum Institute’s Standard 610, which provides specifications for centrifugal pumps used in the petroleum, petrochemical, and natural gas industries. It covers various aspects of pump design, materials, and performance.
- API RP 686: This is another document from the American Petroleum Institute, specifically a Recommended Practice (RP) titled “Recommended Practices for Machinery Installation and Installation Design.” It offers guidelines for the proper installation of machinery, including pumps, to ensure they operate effectively and safely.
- Pump Manufacturers IOM: IOM stands for “Installation, Operation, and Maintenance.” This likely refers to the documentation provided by pump manufacturers that outlines how to properly install, operate, and maintain their specific pump models. It’s essential to follow these instructions to ensure the pump’s longevity and performance.
- EPC/Contractor Specs Procedures: EPC stands for Engineering, Procurement, and Construction, and this reference suggests that you should follow the specifications and procedures provided by the engineering, procurement, and construction contractors involved in the project. These documents typically detail how the equipment, including pumps, should be installed and operated.
- End User Specs Procedures: These are the specifications and procedures provided by the end user or owner of the equipment, which outline their specific requirements and expectations for the installation and operation of the pumps.
- QA Checks and Acceptance Standards: This likely refers to quality assurance checks and acceptance criteria that need to be met during the installation and commissioning of the pumps. It ensures that the equipment meets the required quality standards.
- Grout Manufacturer Instructions: If grouting (a material used for supporting and leveling equipment) is needed for the pump installation, it’s crucial to follow the instructions provided by the manufacturer of the grout. Proper grouting is essential for the stability and performance of the pump.
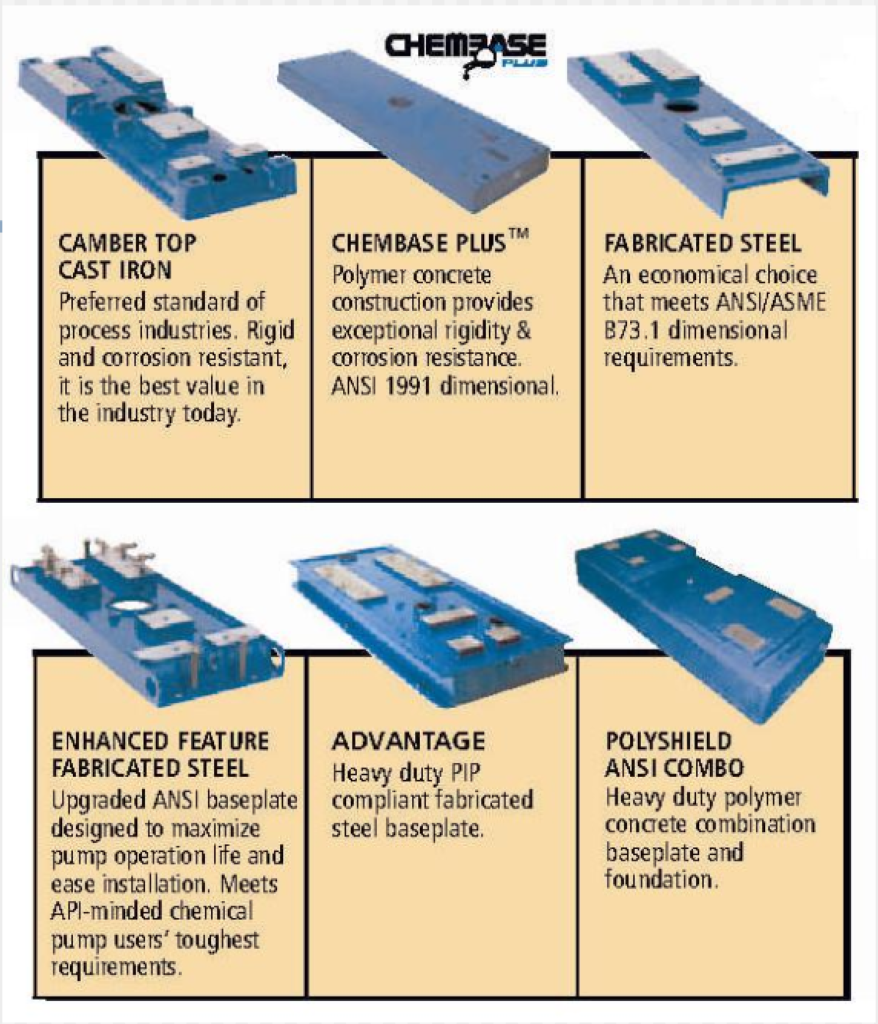
Baseplate Options for Pump Installation:
Discusses various options for baseplates used in pump installations and the approach to balancing quality and cost in their selection.
- No Baseplate: In some cases, pumps may be installed without a dedicated baseplate, although this is less common.
- Pedestal Rails: These are raised rails that support the pump. They provide stability and space underneath for maintenance.
- Soleplates: Soleplates are flat, sturdy plates that the pump sits directly on. They provide a stable foundation.
- FRP (Fiber-Reinforced Plastic): FRP baseplates are made of a composite material that is lightweight and corrosion-resistant.
- Cast Iron: Cast iron baseplates are durable and provide good stability.
- Channel/Formed/Block Pedestals (ANSI Market): These are various types of supports designed to meet ANSI (American National Standards Institute) standards.
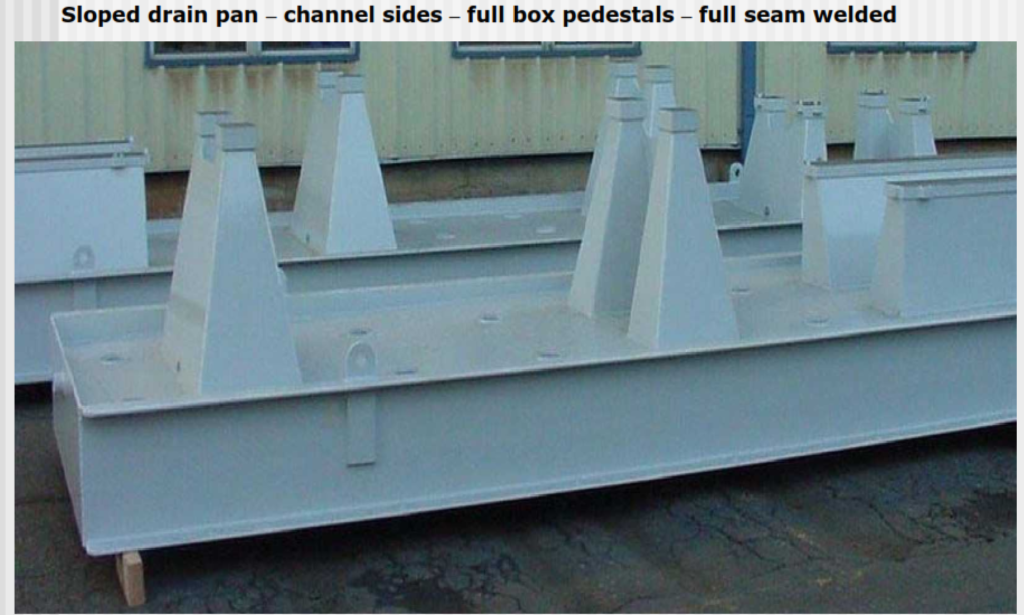
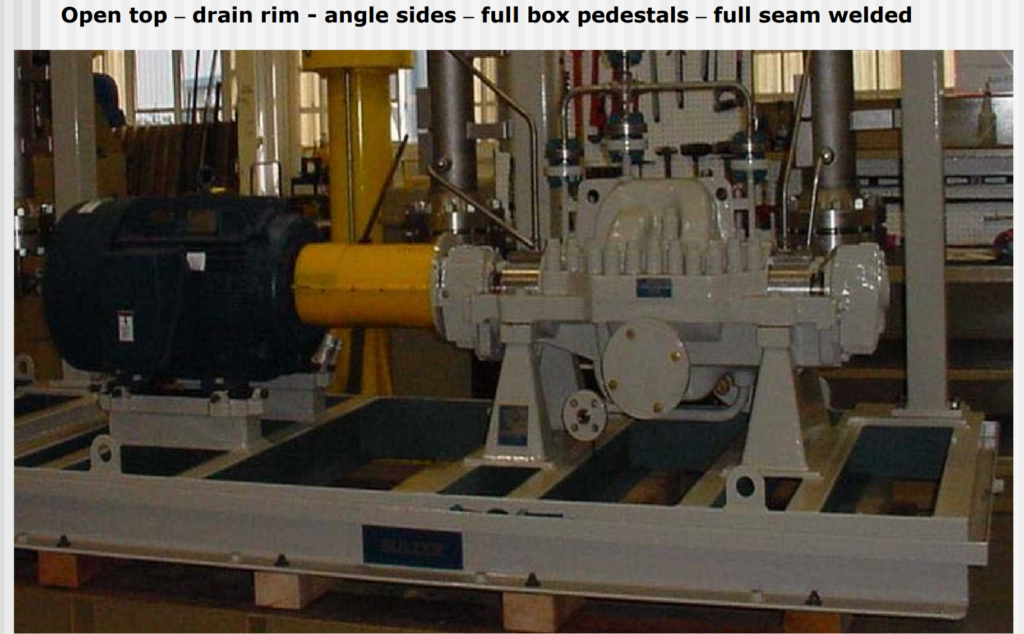
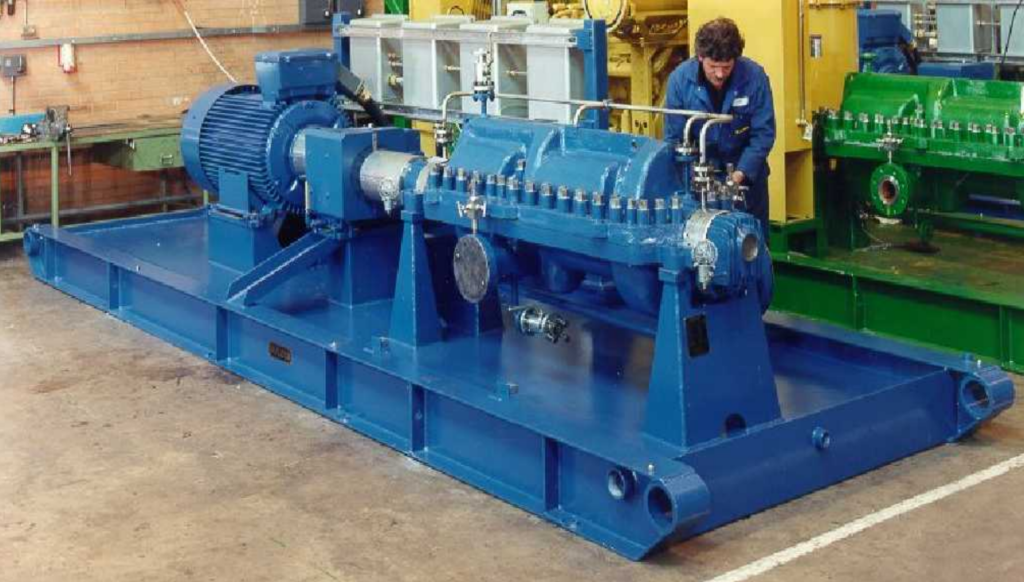
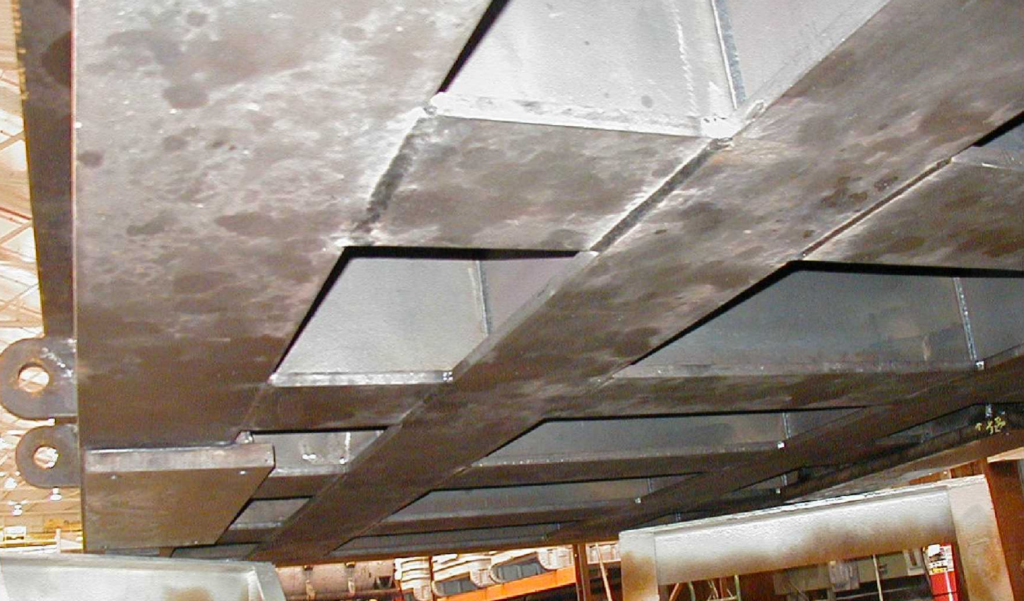
- Fabricated Steel (API Market): Fabricated steel baseplates are commonly used in the API (American Petroleum Institute) market and can have different designs, including sloped drain pan tops, flat tops with sloped drain rims, I-beam construction, and more.
- Drilled and Tapped for Equipment Hold Down Bolts (Not Thru-Bolted): The baseplate can be prepared with holes for securing the pump in place.
- Box Pedestal Construction (Thick Plate): This involves a sturdy, box-like construction for added stability.
- Pedestal Pad Thickness: The thickness of the baseplate material can vary, affecting its strength and stability.
- Stress Relieving of Fabricated Steel: Stress relieving is a process to reduce internal stresses in the steel, which can improve the baseplate’s performance.
Approach to Quality and Cost:
- Specify Baseplate Design/Construction: In this approach, you specify the exact design and construction of the baseplate according to your specific requirements. This allows for greater control over the quality and performance of the baseplate but may be more costly due to customization.
- Accept Vendor Standard Design and Construction: Alternatively, you can opt to use baseplates that are already designed and manufactured to standard specifications by the vendor. This can be a cost-effective option, but it may limit your ability to customize the baseplate to your exact needs.
Ultimately, the choice of baseplate should align with your project’s requirements for stability, durability, and any specific industry standards. Balancing quality and cost depends on the criticality of the pump installation, budget constraints, and the need for customization. Careful consideration of these factors will help you make the most suitable choice for your pump installation.

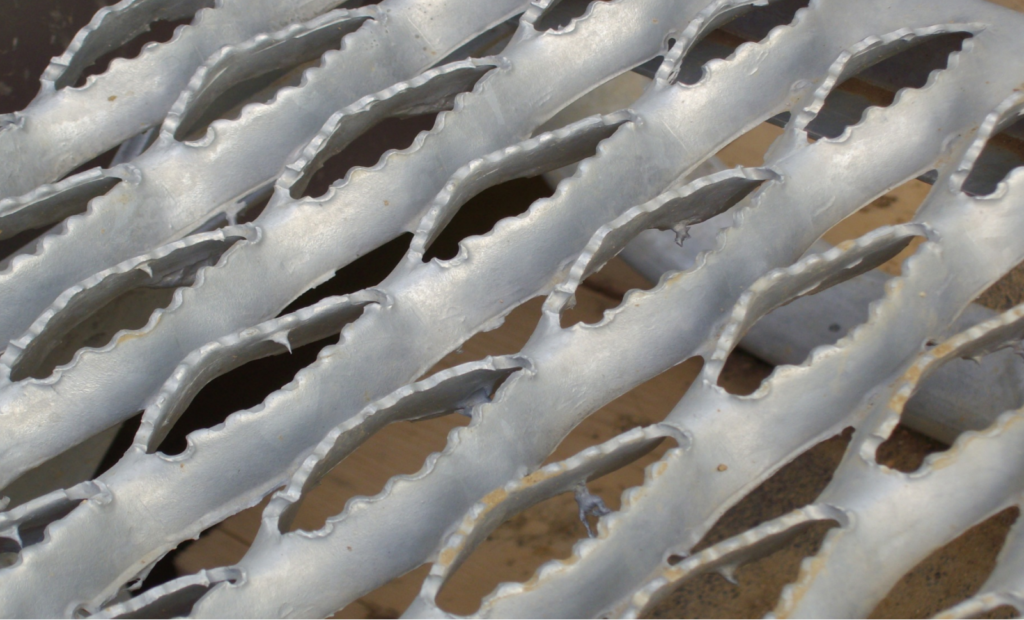
Non-slip grating example: