This article is about Skype for business conference call with external users and skype for business web app. This article also describes how to send skype meeting invite link and join skype meeting without link.
Using Skype for Business to Hold Online Meetings
Online meetings that have been scheduled are registered to your Outlook calendar. To attend a meeting, click the URL link listed in the Outlook appointment.
1. Attending Schedule Online Meetings:
- Double-click the online meeting to attend on the Outlook Calendar screen.
- Click [Join Skype Meeting].
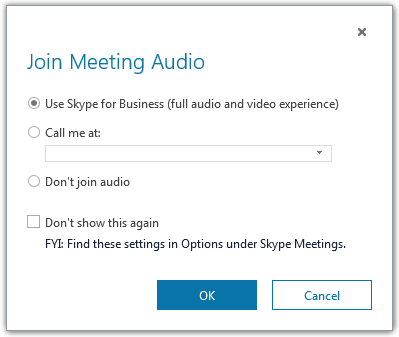
- Select [Use Skype for Business (full audio and video experience)], and then click [OK].
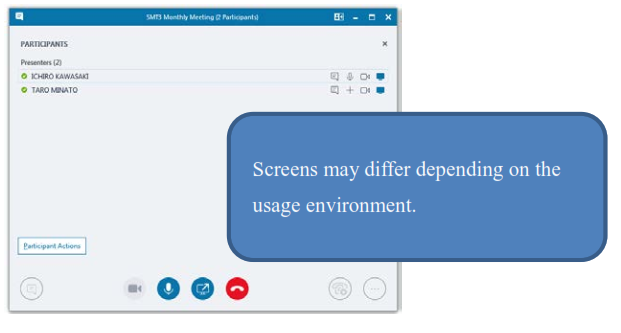
- The online meeting starts.
Note: Attending from Skype for Business
Your appointments for the day registered in Outlook are also listed in Skype for Business, so you can attend scheduled online meetings directly from Skype for Business. You can attend online meetings from Skype for Business as follows.
◆ In Skype for Business, click (Meeting), double-click the appointment for the online meeting to attend, select [Use Skype for Business (full audio and video experience)], and then click [OK]
* Appointments for which online meetings have been set are shown in blue text.
2. Sharing Desktops
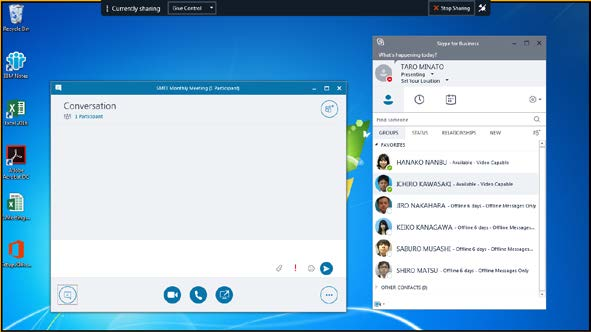
Participants in online meetings can show other participants their own desktops by sharing their desktops. You can even select which monitor to share if you are using more than one.
* Some screens may differ depending on the usage environment.
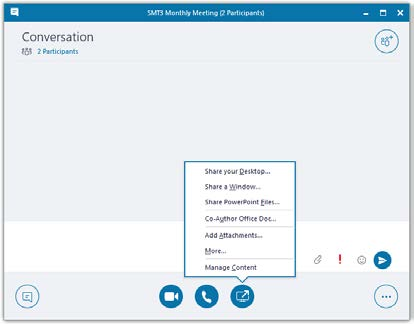
- In the Conversation window, click
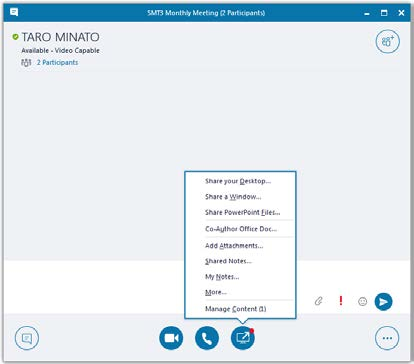
(Share Content), and then select [Share your Desktop].
* If you are using more than one monitor, click the monitor to share.
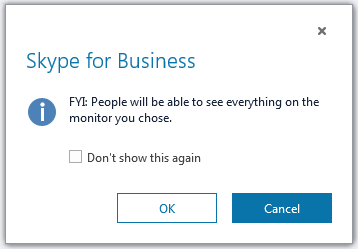
2. If the following screen is displayed, click [OK].
Your desktop is shared.
* Point the cursor at the top of the screen to display the Sharing bar.
* To stop sharing, click [Stop Sharing] on the Sharing bar.
Note: Shared screens
When sharing a desktop or program, the participant who started sharing can give control to another participant. You can give control to another participant while sharing as follows.
◆ Click [Give Control] on the Sharing bar, and then select the participant to whom to give control.
Note: Other participants’ screens
When a participant in an online meeting begins sharing, the Conversation window is expanded to show the shared screen. You can also request control from the participant who started sharing.
3. Attaching and Distributing Materials during Online Meetings
Participants in online meetings can distribute documents, images, and other files to other participants by adding attachments to meetings. Other participants can then save these files to their computers for later use.
* Some screens may differ depending on the usage environment.
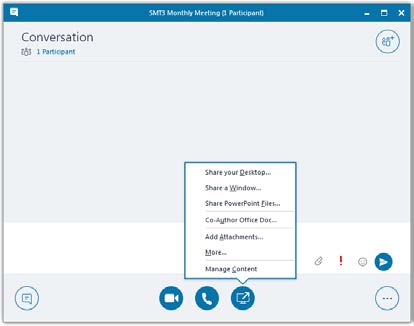
- In the Conversation window, click
(Share Content), and then select [Add Attachments…].
2. Select the file to attach, and then click [Open].
3. Once the upload is complete, click [Close].
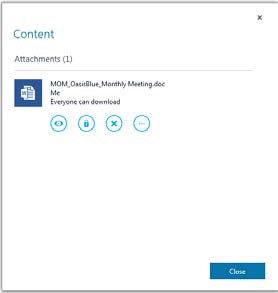
4. After clicking (Share Content) and selecting [Manage Content], file information is displayed.
Note: Other participants’ screens
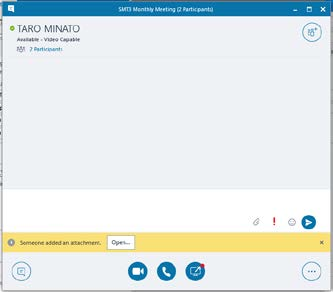
[Someone added an attachment] will be displayed on other participants’ screens. Clicking [Open] next to the message will display the attachment list screen.
Clicking (Open) will open the attachment.
* Refer to “Note: Downloading attachments” for details on how to download.
Note: Downloading attachments
You can download files attached to online meetings as follows.
◆ Click (Share Content), select [Manage Content], click
(Other Options) for the file to save, select [Save As…], set the [Save Location] and [File Name], and then click [Save]
4. Recording Online Meetings
Recording online meetings allows you to view a meeting even if you were not able to attend. Recorded meetings are saved as MP4 files that can be played in Windows Media Player.
* Some screens may differ depending on the usage environment.
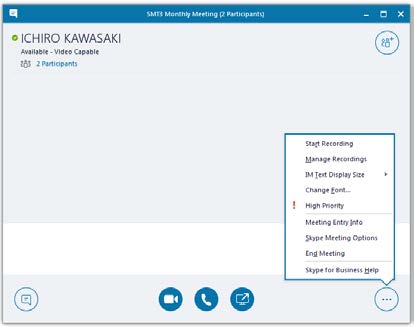
- In the Conversation window, click
(Other Options), and then select [Start Recording].
* Recording can only be done during Skype for Business online meetings (when attending a Skype for Business audio meeting) or during voice/video calls.
* The recording function may not be available depending on the version of Windows Media Player that is installed. If this is the case, upgrade Windows Media Player and try again.
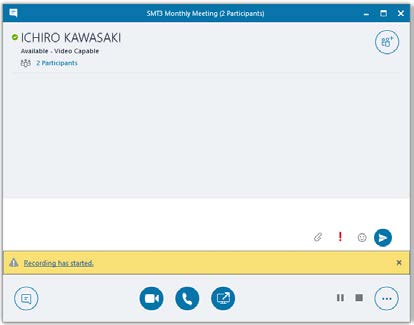
[Recording has started] is displayed, and recording begins.
* [Recording has started] is also displayed on the screens of other participants.
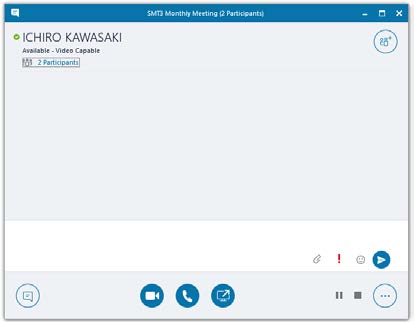
- To stop recording, click
(Stop Recording).
* You cannot continue recording to a file for which you have stopped recording. To pause recording (such as during a break) and then resume recording to the same file, use (Pause Recording).
Note: Playing recordings
You can play saved recordings as follows.
◆ On the top right of the Skype for Business screen, click beside
(Options) , point the cursor at [Tools], select [Recording Manager], select the recording to play, and then click [Play]


