Following topics to be covered in this article.
- SCOPE
- REFERENCES
- GENERAL
- SAFETY
- MATERIALS
- PROCEDURES FORMATS
- INSPECTION
TABLE
I – Information Summary for All Carbon Steel Welds Made in the 5G-Horizontal Fixed “Bell Hole” Position with 1/8 inch diameter Electrode and No. 5 or Larger Cup
II – Information Summary for All Carbon Steel Welds Made in the Vertical Position with 1/8 inch diameter Electrode and No. 5 or Larger Cup
III – Dimensions of Welded and Seamless Pipe
APPENDIX
A – Single Vee, Double Vee or Square QW-482 Format for Welding Procedure Specification (WPS)
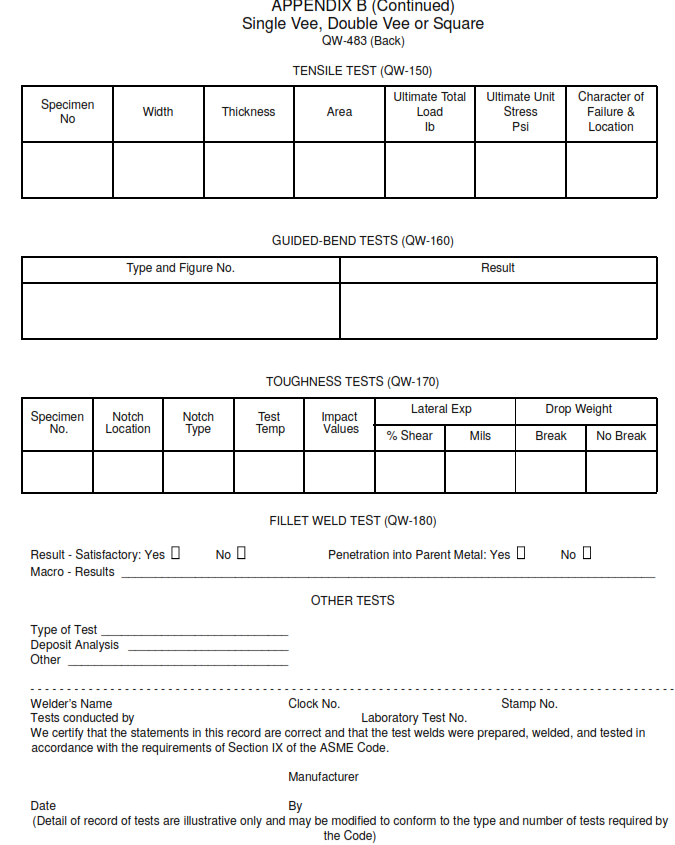
B – Single Vee, Double Vee or Square 0.216 inch. QW-483 Format for Procedure Qualification Record (PQR)
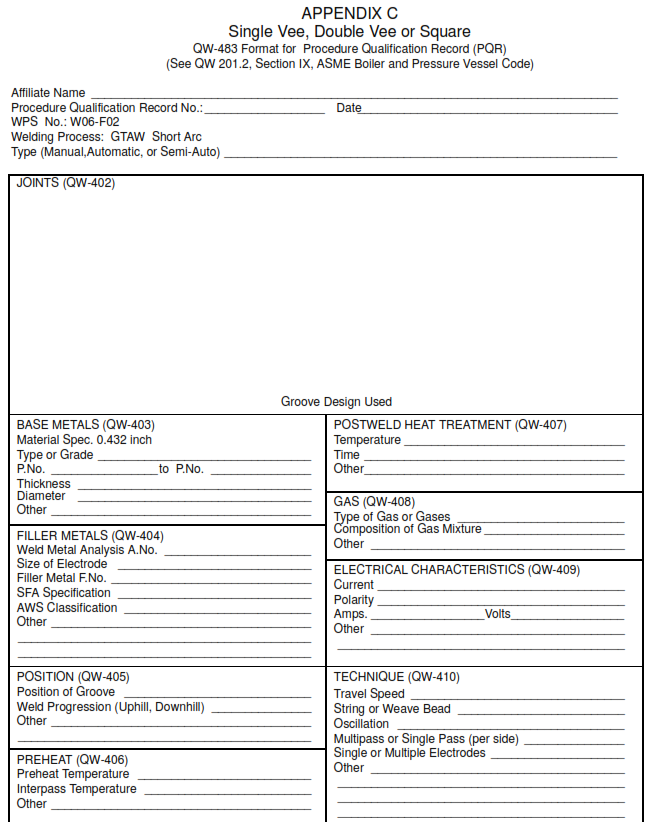
C – Single Vee, Double Vee or Square 0.432 inch QW-483 Format for Procedure Qualification Record (PQR)
Welding Low-Carbon Steel Plate and Pipe by GTAW Process
1. Scope
1.1 This standard describes the requirements for welding carbon steel 1.6 mm to 22 mm (1/16 in to 7/8 in) thick plate or pipe in all positions using the Gas Tungsten Arc Welding (GTAW) process for either open butt or back-up rings to assure welds of acceptable quality in work performed by SABIC Affiliates, vendors, or contractors.
2. References
Reference is made in this standard to the following documents.
American National Standards Institute (ANSI)
B31.3 Process Piping Code
B36.10M Welded and Seamless Wrought Steel Pipe
B36.19M Stainless Steel Pipe
American Petroleum Institute (API)
620 Design and Construction of Large, Welded, Low-Pressure Storage Tanks
650 Welded Steel Tanks for Oil Storage
American Society of Mechanical Engineers (ASME)
Section IX Welding and Brazing Qualifications
3. General
3.1 Generally, it is not necessary or economical to purge carbon steel welds. An exception would be when welding critical lines where scale could not be tolerated. Purging is also an advantage when a flush root pass is required.
3.2 The root pass on carbon steel shall be welded with filler rod. The addition of filler rod helps eliminate porosity and results in a more uniform root pass. To avoid porosity on steels not fully killed, deep melting shall be offset through the addition of highly deoxidizing filler metals.
3.3 Recommended machine settings (plus or minus 10 percent) for pipe are listed in Table I and for plate in Table II of this specification.
3.4 Adherence to applicable codes is mandatory. For ASME Code-approved work the shop shall be ASME authorized, and the procedure, as outlined on ASME forms on pages 8 through 13, shall be qualified for Code inspector approval at each site where it is to be used. Each welder doing ASME Code work shall also qualify for the inspector’s approval using the qualified procedure. The welder shall be a regular employee of that ASME authorized shop. For details refer to SES W11-F01.
3.5 Departures from this standard, for work not requiring ASME Code rules, may be practiced as long as testing and inspection are adequate to prove that weld quality is not impaired. For instance, ASME Section IX is referenced by other Codes such as ANSI B31.3, API 620, and 650.
4. Safety
Safe practices prescribed in SES W02-F01 shall be followed on plant sites.
5. Materials
5.1 Table I provides information summary for all carbon steel welds made in the 5G horizontal fixed “Bellhole” position with 1/8 inch diameter electrode and No. 5 or larger cup.
5.2 Table II provides information summary for all carbon steel welds made in the vertical position with 1/8 inch diameter electrode and No. 5 or larger cup.
5.3 Table III provides dimensions of welded and seamless pipe (ANSI B 36.10 and B 36.19).
6. Procedures Formats
The following formats are recommended to be used as practice.
6.1 Single Vee, Double Vee or Square. QW-482 Format for Welding Procedure Specification (WPS) . See Appendix A pages 1 and 2.
6.2 Single Vee, Double Vee or Square. 0.216 inch. QW-483 Format for Procedure Qualification Record (PQR) – See Appendix B pages 1 and 2.
6.3 Single Vee, Double Vee or Square. 0.432 inch. QW-483 Format for Procedure Qualification Record (PQR) – See Appendix C pages 1 and 2.
7. Inspection
7.1 The amount and type of inspection required depends upon the service conditions and hazards to personnel and property. It is the responsibility of the originator to define the inspection requirement. Inspection shall be in accordance with applicable code(s).
TABLE I – Information Summary for All Carbon Steel Welds Made in the 5G-Horizontal Fixed “Bell Hole” Position with 1/8 inch diameter Electrode and No. 5 or Larger Cup
TABLE II – Information Summary for All Carbon Steel Welds Made in the Vertical Position with 1/8 inch diameter Electrode and No. 5 or Larger Cup
TABLE III – Dimensions of Welded and Seamless Pipe (ANSI B36.10 and B36.19)


