This article is about Samson Cryo valve assembly procedures and Actuator Mounting Procedure.
Samson Cryo Valve Assembly Procedures
Type 3.248 Cryogenic Control Valve CLASS 150/300

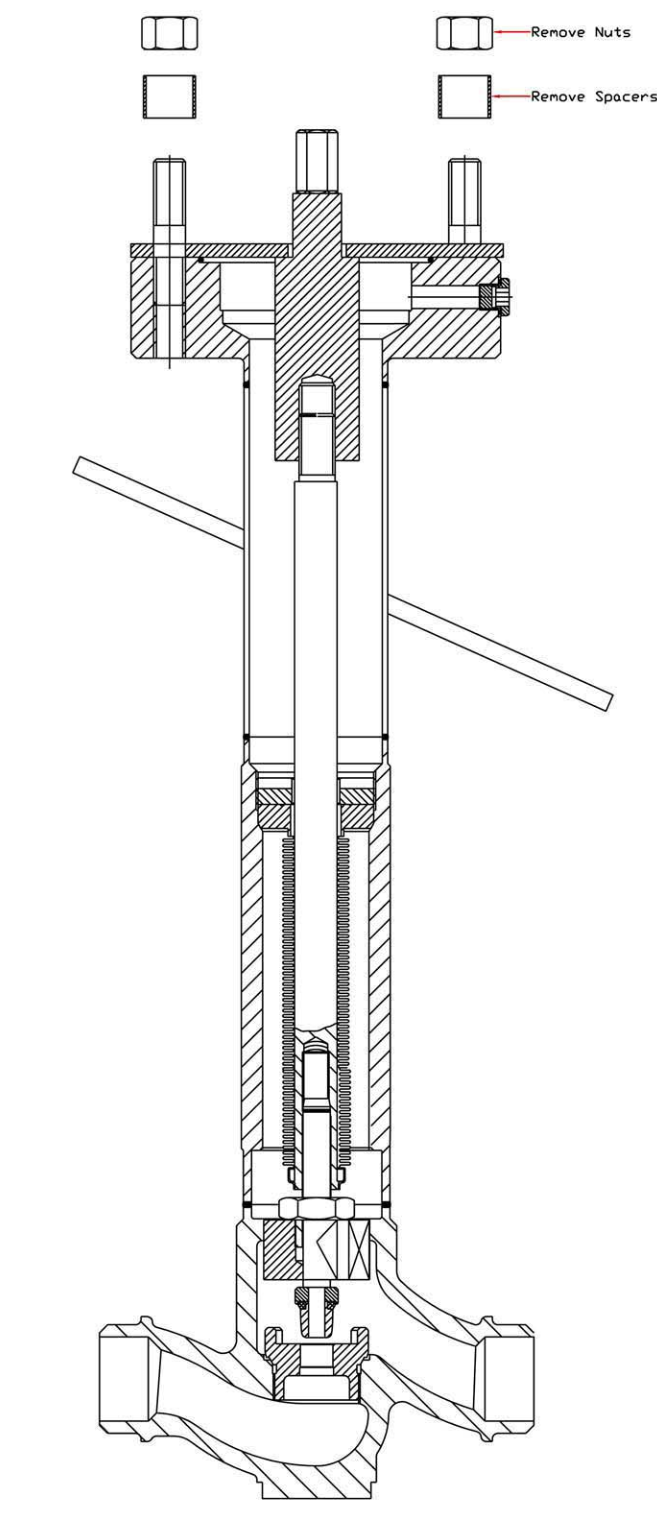
3.248 Cold Box Valve As Supplied With Shipping Cover Fitted.

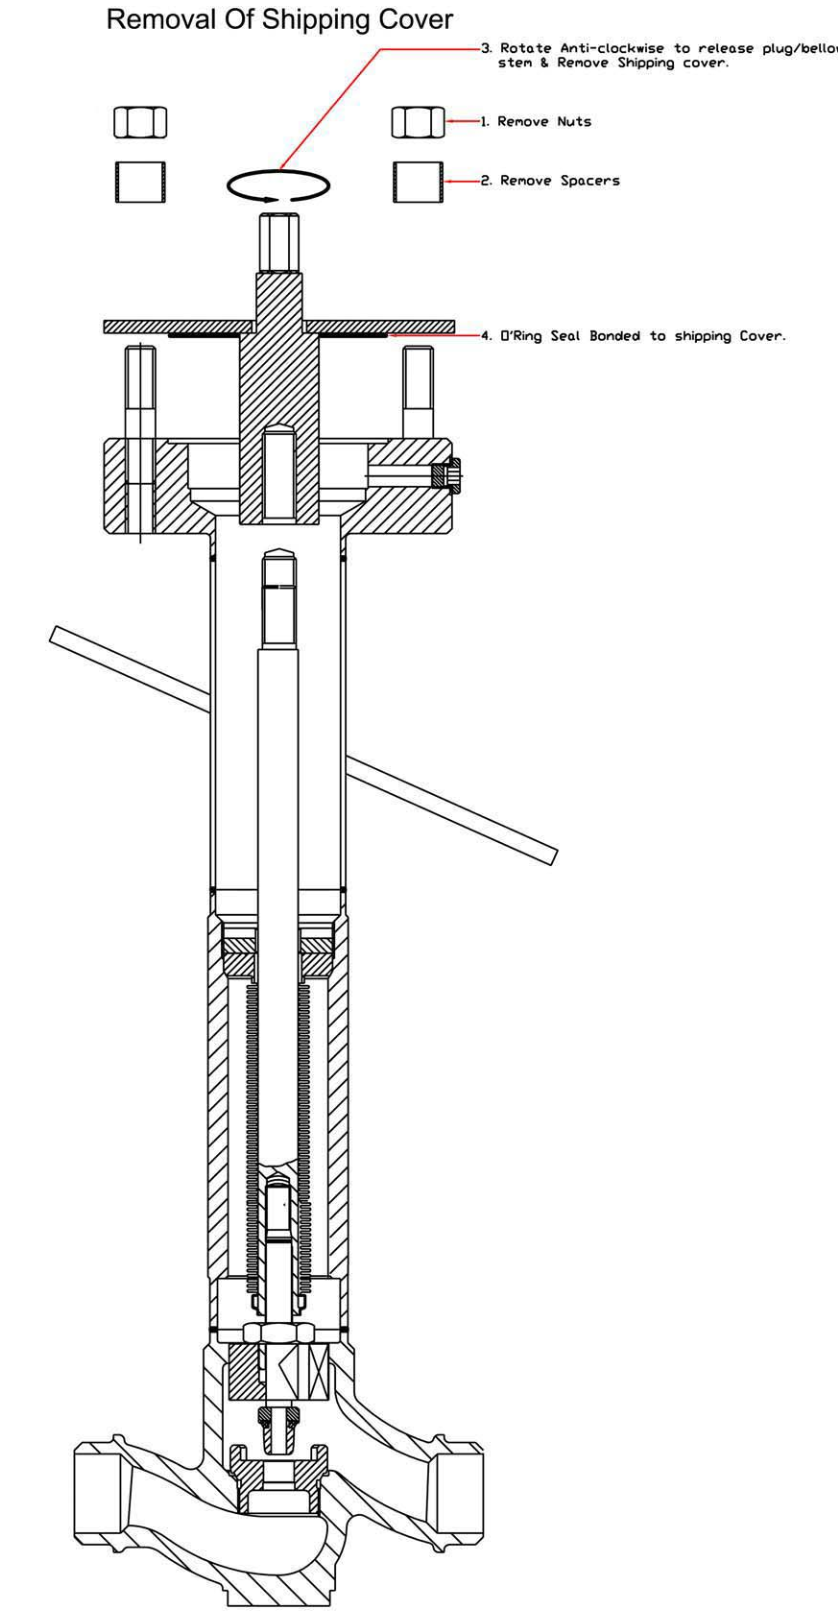
Removal Of Shipping Cover
Removal Of Shipping Cover
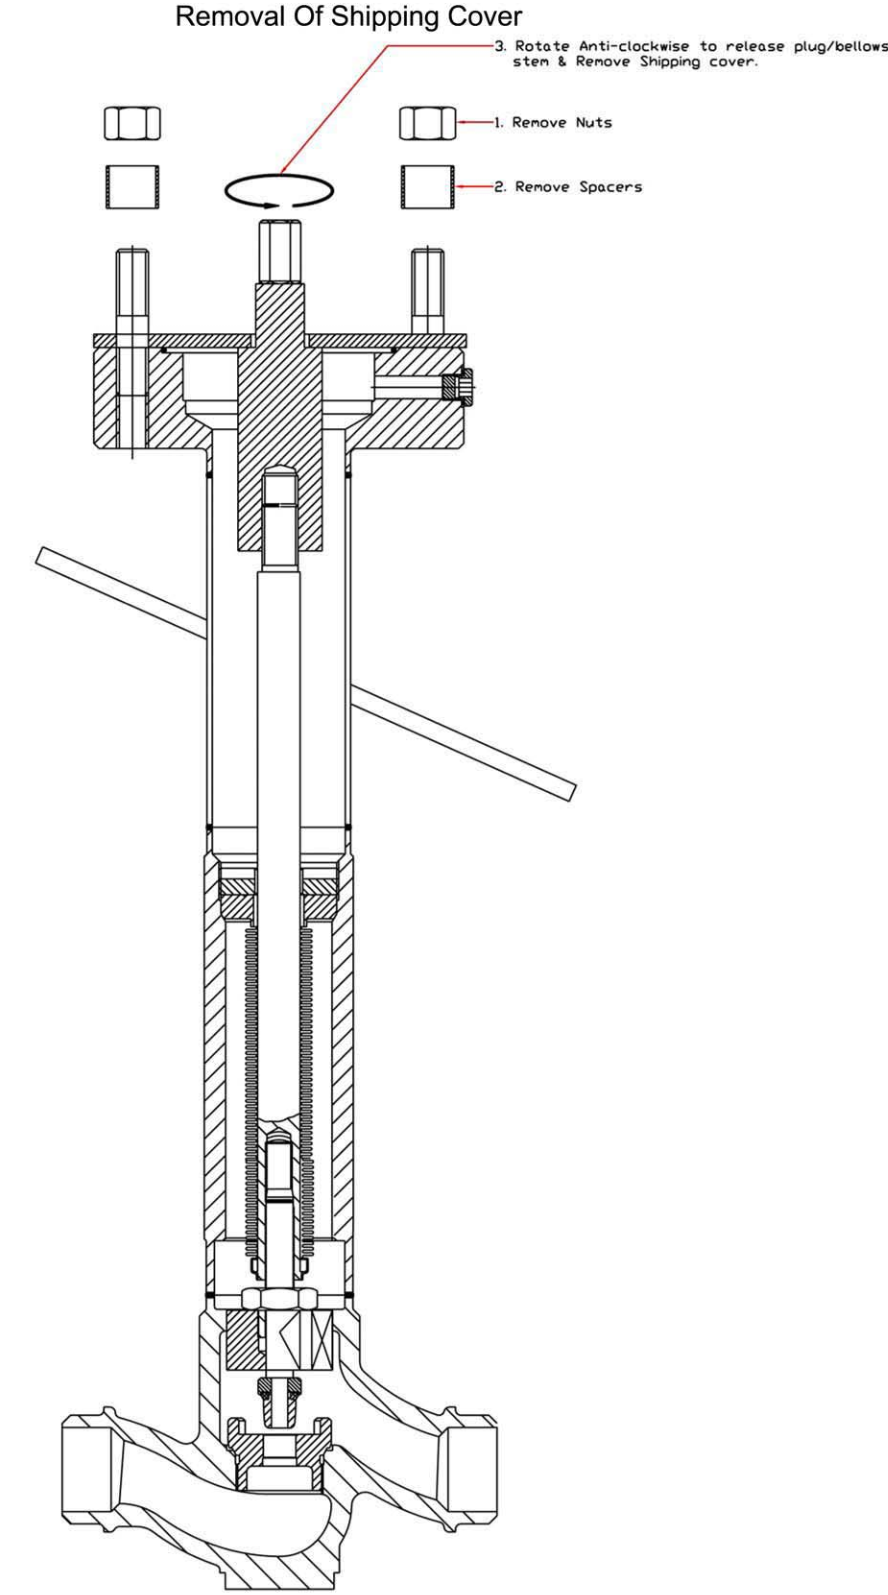
Removal Of Shipping Cover
3.248 Valve Bonnet Sub-Assembly

3.248 Valve Bonnet Sub-Assembly Mounting

3.248 Valve Bonnet Sub-Assembly Mounting

3.277 Actuator Sub-assemblies As Supplied
Step 1
Fail Closed Stem Extended, as supplied
Step 2
Fail Open Stem Retracted, as supplied
Step 3
1. Unscrew castellated nut & retain
2. Remove gauge connection block assembly, by un-screwing the 6 mm socket head bolt
Step 4
1. Unscrew castellated nut & retain
2. Remove the external tubing

3.277 Actuator Sub-assembly Mounting Procedure

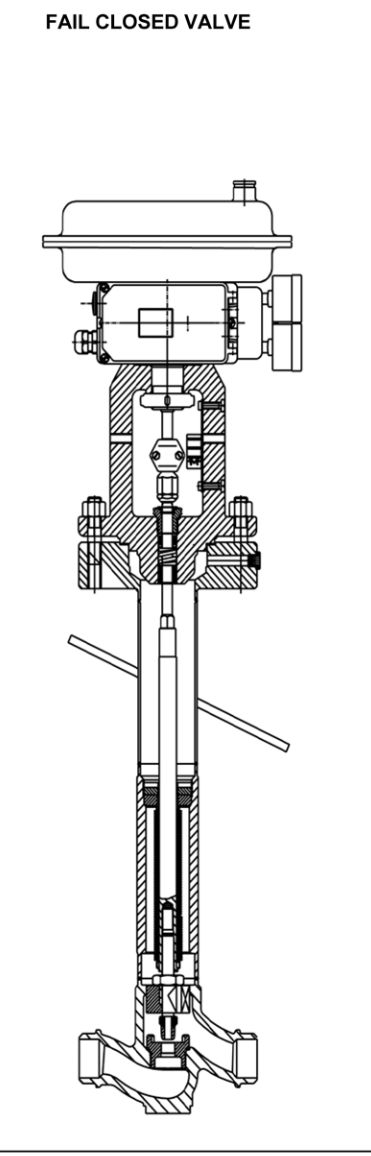
FAIL CLOSED VALVE
1. Drop castelated nut over plug stem.
2. Screw a 3/8″ Swagelok fitting into actuator.
3. Hook-up a regulated air supply, 6 barg Max., to Swagelok fitting.
4. With the air conneted to the actuator to retract the
spindle, drop actuator onto the valve bonnet.
5. Screw castelated nut onto actuator thread & tighten.
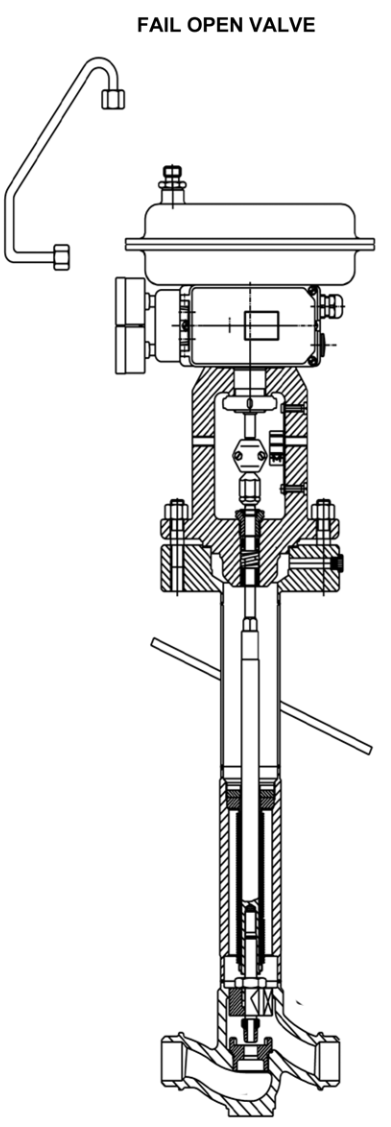
FAIL OPEN VALVE
1. Drop castelated nut over plug stem.
2. Drop actuator onto valve bonnet.
3. Screw castelated nut onto actuator thread & tighten.
3.277 Actuator Sub-assembly Mounting Procedure
FAIL CLOSED VALVE
1. Remove supply air & Swagelok fitting from actuator. The actuator stem will extend onto the plug stem.
MIND YOUR FINGERS!
2. Re-fit positioner gauge connection block assembly to valve.
3. Clamp actuator & plug stem together

FAIL OPEN VALVE
1. Hook-up a regulated air supply, 6 barg Max., to the fitting on the topside of the actuator. This will extend the actuator stem onto the plug stem.
MIND YOUR FINGERS!
2. With the air supply connected clamp actuator & plug stem together

FAIL CLOSED VALVE
1. Perform a positioner calibration check for the zero & span adjustments. It may be necessary to make a small change to the zero. The Span should not require any change.
FAIL OPEN VALVE
1. Re-fit the external tubing to the actuator & positioner gauge connection block.
3.277 Actuator Sub-assembly Mounting Procedure
1. Valve assembly completed.

1. Perform a positioner calibration check for the zero & span adjustments. It may be necessary to make a small change to the zero. The span should not require any change.
2. Valve assembly completed.

Type 3248 Cryogenic Valve Assembly instructions for the protective cover


Control Valve Actuators and Accessories(Opens in a new browser tab)