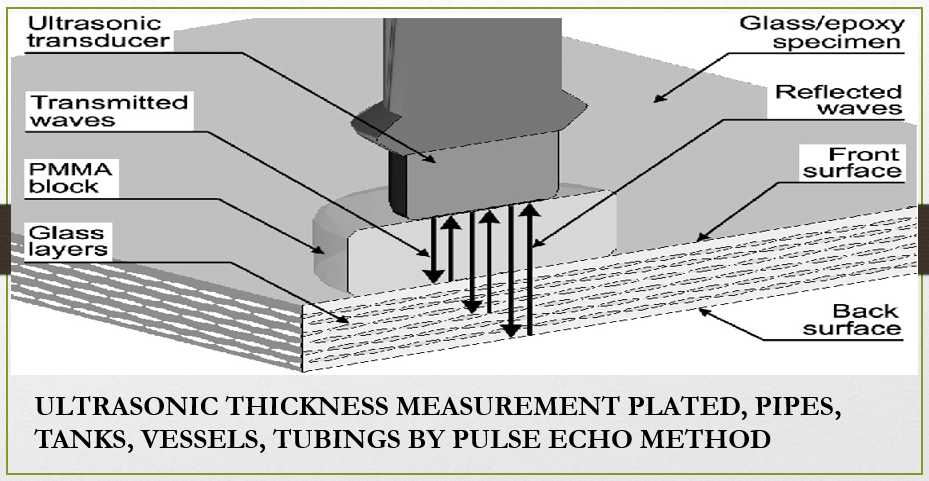
This article is about manual ultrasonic thickness measurement of base materials in plates, pipes, tanks, vessels, tubings, castings and forgings using the contact pulse echo method.
- Scope.
- References.
- Personnel Qualification.
- Safety.
- General Requirements.
- Equipment and Materials.
- Calibration.
- Examination.
- Documentation.
Appendix A – Ultrasonic Thickness Measurement Report.
ULTRASONIC THICKNESS MEASUREMENT
1.0 SCOPE
This procedure establishes the requirements for manual ultrasonic thickness determination of base materials in plates, pipes, tanks, vessels, tubings, castings and forgings using the contact pulse echo method at temperatures not to exceed 200 °F (93°C) conducted in accordance with the requirements of the referenced codes/standards. High temperature materials, up to about 540°C (1000F), can be measured with specially designed instruments with high temperature compensation, search unit assemblies and couplants.
This procedure specifies the techniques for manual ultrasonic thickness measurements within the thickness range of 0.050 in. (1.2 mm) to 6.0 in (150 mm) for most geometric configurations encountered in fabrication under normal conditions.
2.0 REFERENCES
2.1 Reference is made in this procedure to the following documents. The editions, amendments and supplements to these documents shall apply to the extent specified in this procedure.
American Society of Mechanical Engineers
ASME B31.3 Process Piping, 2012 edition.
ASME B31.1 Power Piping, 2o12 edition.
ASME B31.4 Pipeline Transportation Systems for Liquid Hydrocarbons, 2012 edition.
ASME B31.8 Gas Transmission & Distribution Piping Systems, 2012 edition.
ASME SECI Rules for Construction of Power Boilers, 2o13 edition.
ASME SEC V Nondestructive Examination, 2013 edition.
ASME SEC VIII DI and 2 Rules for Construction of Pressure Vessels, 2o13 edition.
American Petroleum Institute
API STD 650 Welded Steel Tanks for Oil Storage, 12 edition, 2013
API STD 1104 Welding of Pipelines and Related Facilities, 20 edition 2010
API STD 510 Pressure Vessel Inspection Code, 1 edition
API STD 570 Piping Inspection code, 3 Edition
API STD 653 Tank Inspection, Repair, Alteration and Reconstruction 4 edition
API STD 1104 Welding of Pipelines and Related Facilities, 20″ edition 2010
3.0 PERSONNEL QUALIFICATION
3.1 Personnel performing manual ultrasonic thickness testing according to this procedure shall be qualified and certified to an appropriate level in accordance with AYC.EP.1401, Procedure for Qualification & Certification of NDT personnel, which complies with the requirements of editions 2006 through 2011 of SNT-TC-LA & ANSI/ASNT CP-189 of the American Society for Non destructive Testing.
4.0 SAFETY
4.1 The ultrasonic technician shall exercise appropriate care at all times and work in accordance with instructions and defined operating and safety procedures. International, national and local safety and environmental protection regulations shall be observed at all times.
5.0 GENERAL REQUIREMENTS
- Surface Preparation. All surfaces to be examined shall be free of any substance which may impede the free movement of the search unit or hinder the transmission of ultrasound to the material. When the base material surface interferes with the examination, the base material shall be prepared as needed to permit the examination.
- Post Cleaning. When post examination cleaning is required, it should be conducted as soon as practical after evaluation and documentation using a process that does not adversely affect the part.
6.0 EQUIPMENT and MATERIAI.S
- Instrument Requirements. Ultrasonic measurements shall be conducted using pulse echo type instruments capable of generating and receiving frequencies up to 5MHz and having integral gating to produce digital reading. The instrument shall have an A-scan to assist the operator in the discrimination of test results.
- Transducers. Transducers shall be within the manufacturer’s specification for the instrument being used. When selecting a transducer, consideration shall be given to the surface temperature, expected thickness of the specimen and the resolution required.
- Transducer may contain single or dual elements and shall be fully compatible with the instrument. Digital thickness meters with A-scan presentation shall use only manufacturer provided transducers.
6.3 Couplant
- A propriety brand couplant or other suitable couplants such as oil grease, glycerine, or water based couplant, shall be used. The couplant including additives shall be compatible to the material under examination, have good wetting characteristics and not detrimental to the material being examined.
- Couplants used on nickel base alloys shall not contain more than 250 ppm of sulfur. Couplants used on austenitic stainless steels or titanium shall not contain more than 250 ppm of halides (chlorides plus fluorides).
6.4 Calibration Blocks
6.4.1 Calibration blocks shall have sound velocities within ± 5% of the material to be tested.Calibration shall be performed on blocks made of the same material being tested or on known specimen thickness values when greater accuracy is required.
7.0 CALIBRATION
- The proper functioning of the examination system shall be checked and the equipment shall be calibrated by the use of calibration block at
- the beginning and end of each shift
- when examination personnel are changed
- when any equipment is changed
- when a malfunctioning of the equipment is suspected.
- Calibration blocks shall be at ambient temperature during calibration. Calibration blocks should not be cooled or heated for cryogenic or high temperature applications. All calibration values shall be within ± 0.05 mm of the known thickness value. Consideration should be given to retaking all of the measurements since the last calibration if the instrument deviates by more than 0.05 mm at the end of the shift.
- Calibration of pulse-echo type equipment: Pulse echo type equipment shall be calibrated using standard step wedge or sample of material with known thickness preferably parallel-machined surfaces. Probe diameter shall not exceed 25mm.
- The equipment shall be calibrated using a two-point calibration range that overlaps the expected measurement range, i.e., select a calibration block or step wedge thickness value greater than the maximum expected measurement value and a calibration block or step wedge value less than the expected measurement value.
8.0 EXAMINATION
8.1 Examination Coverage. The extent of examinations shall be determined and specified by the client prior to testing.
8.2 Measurement
- Examinations shall be conducted from the OD surface or ID surface, as applicable.
- It is necessary that the examiner take into consideration the surface the component. If the surface temperature is below 32 °F (0 °C) or above 215°F (101 °C), the surface temperature shall be measured and recorded.
- Apply couplant to the probe or the specimen surface. For high temperature measurements, couplant should always be applied to the face of the probe, not the hot part.
- The transducer acoustic barrier shall be placed perpendicular to the center axis when taking measurements on pipe or round objects up to 24 inches in diameter. The acoustic barrier orientation is not important on pipe and round objects greater than 24 inches in diameter.
- The transducer shall be held flat on the surface then slowly rocked tangentially after contact to find the lowest reading. All digital readings shall be verified by viewing the A-scan presentation on the instrument as doubling effects can give false readings on digital outputs. The lowest reading shall be recorded. For difficult readings, additional gain may be required to avoid grinding the transducer into the surface.
- A valid reading is one that can be maintained on the gauge display for several seconds and the value is steady within±0.002 in( ± 0.05 mm).
- Thickness readings shall be measured and recorded to three decimal places when working with customary units or two decimal places when working with the metric system.
- Correction for the change in ultrasonic sound velocity in metal is not required within a thickness range of o to 1 inch. Temperature correction shall be performed for metal thickness greater than 1 inch for temperatures below 32F and over 215F. The following formula shall be used:
- Ta = Tm x [1.007 -(0.0001 x Temp)] (1)
Where:
Ta = the actual thickness of the part
Tm = measured thickness of the part
Temp = surface temperature in °F
- Ta = Tm x [1.007 -(0.0001 x Temp)] (1)
- The transducer face shall be cleaned before each measurement at temperatures greater than 400F as evaporated couplant can leave deposits on the transducer face.
- The transducer shall not be held against hot surfaces for a long period of time. It shall be held for for a few seconds to establish a steady reading then removed immediately.
- Use the “touch test” to monitor the transducer temperature. If the transducer face is too hot to be held against your skin then it shall be cooled in air or water prior to taking readings.
9.0 DOCUMENTATION
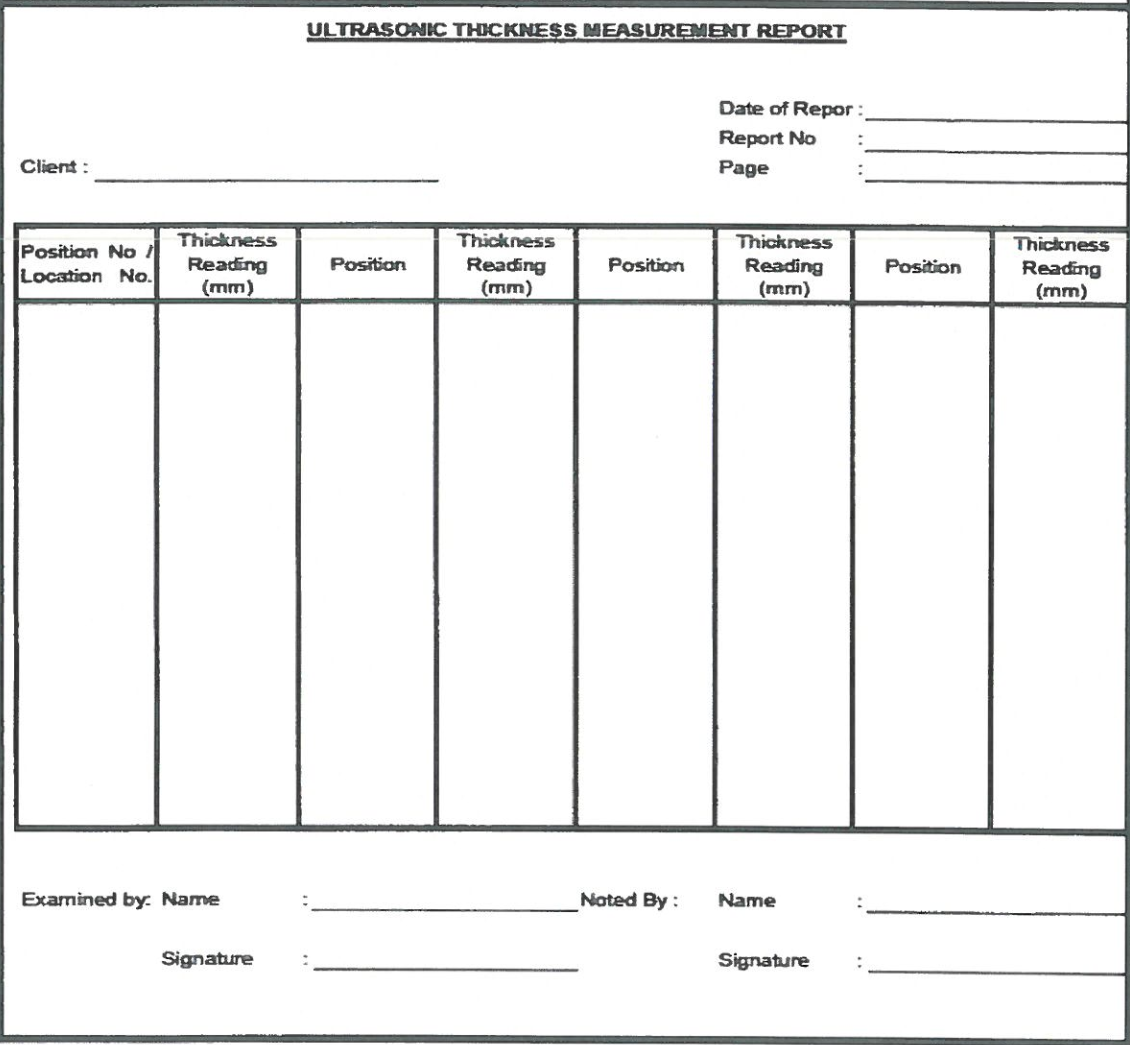
9.1 A report on the details of the test and the results of the thickness measurements shall be recorded in the ultrasonic thickness measurement report provided in appendix A.
ULTRASONIC THICKNESS MEASUREMENT REPORT

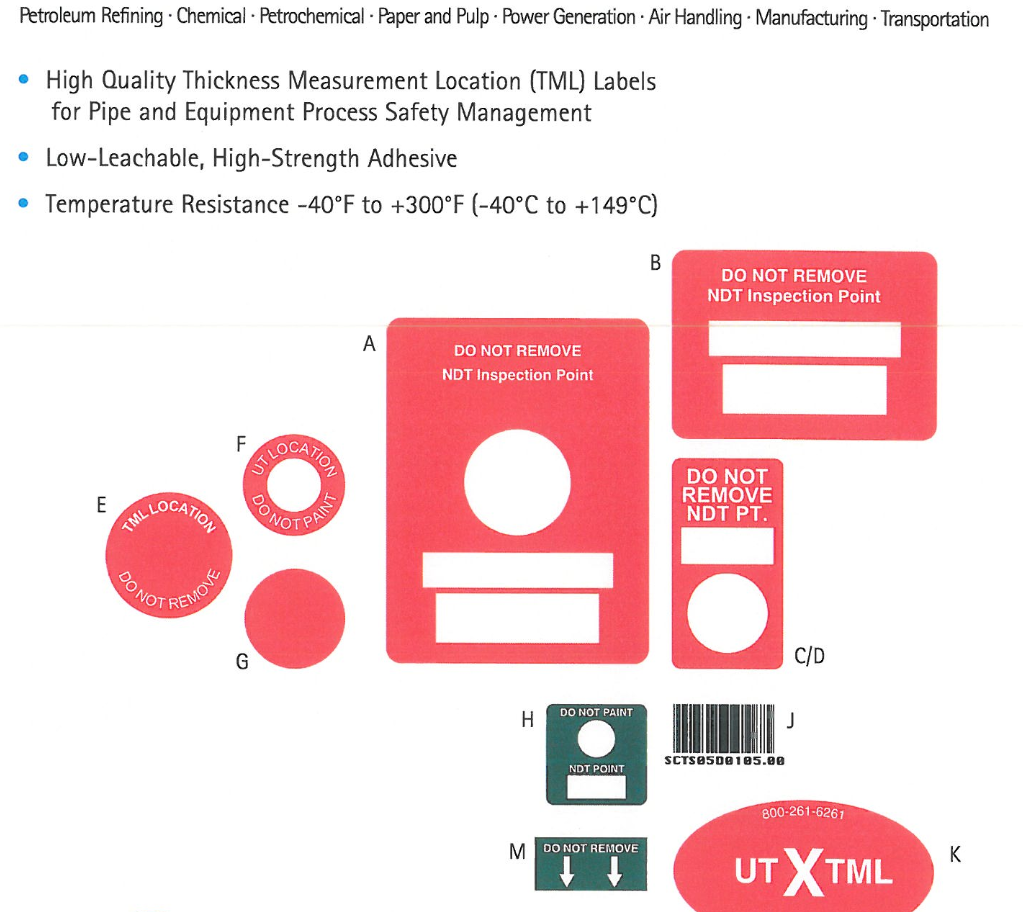
NDT Inspection Point Labels
Ultrasonic Examination Procedure for Thickness Measurement

